You don’t need a gym membership or a fancy barbell rack to deadlift. In fact, the deadlift is one of the few compound exercises you can do almost anywhere — your garage, living room, or backyard. Whether you’re working with dumbbells, a barbell, resistance bands, or even a loaded backpack, learning how to do a deadlift at home correctly is one of the smartest investments you can make in your fitness journey.
In this guide, you’ll learn the proper deadlift form from the ground up, common mistakes to avoid, the best equipment alternatives for home workouts, and deadlift variations that suit all fitness levels. Let’s get into it.
Why You Should Add Deadlifts to Your Home Workout Routine
Before we get into the how, it’s worth understanding why the deadlift deserves a spot in your home training program. The deadlift is a posterior chain exercise — meaning it targets the muscles running along the back of your body. But it’s also a full-body movement that builds functional strength you’ll use in real life every single day.
Here’s what a proper deadlift works:
- Hamstrings and glutes — the primary movers
- Lower back (erector spinae) — for spinal stability
- Upper back (traps and lats) — for keeping the bar close and back flat
- Core muscles — for bracing and protecting the spine
- Forearms and grip strength — for holding the weight
- Quads — for driving through the floor on the initial pull
Beyond muscle building, deadlifts improve your hip hinge mechanics — a fundamental movement pattern for bending, lifting, and avoiding lower back injuries. Studies consistently show that well-coached deadlifts can actually reduce chronic lower back pain, not cause it.
What Equipment Do You Need to Deadlift at Home?
The good news: you have options. You don’t need a 45-lb Olympic barbell to get started. Here are the most practical home deadlift setups from simplest to most advanced:
1. Dumbbells (Best for Beginners)
A pair of dumbbells is the easiest entry point for home deadlifts. They allow a more natural hand position, are easy to store, and still deliver serious results for building strength and muscle. Dumbbell Romanian deadlifts and dumbbell sumo deadlifts are especially effective at home.
2. Resistance Bands
Resistance bands are lightweight, cheap, and surprisingly effective for deadlift training. You stand on the band, grip both ends, and hinge as you would with a barbell. They’re perfect if you’re working with zero equipment or traveling.
3. Barbell and Weight Plates
If you have a barbell and bumper plates at home, you can perform the conventional deadlift exactly as you would in a gym. Bumper plates are safer for home use since they can be dropped without damaging your floor.
4. Kettlebells
A single kettlebell placed between your feet works great for sumo-style deadlifts. The handle height mirrors a standard barbell, making it one of the most gym-accurate alternatives for home training.
5. No Equipment (Bodyweight Hip Hinge)
If you’re a complete beginner, start with a bodyweight hip hinge drill. No equipment needed. This teaches you the movement pattern before you add any load — and it’s the safest starting point for anyone with no deadlift experience.
| 💡 Pro Tip: If you’re just starting out and don’t own any weights, grab a heavy backpack and fill it with books or water bottles. It sounds simple, but it works surprisingly well as a beginner deadlift substitute. |
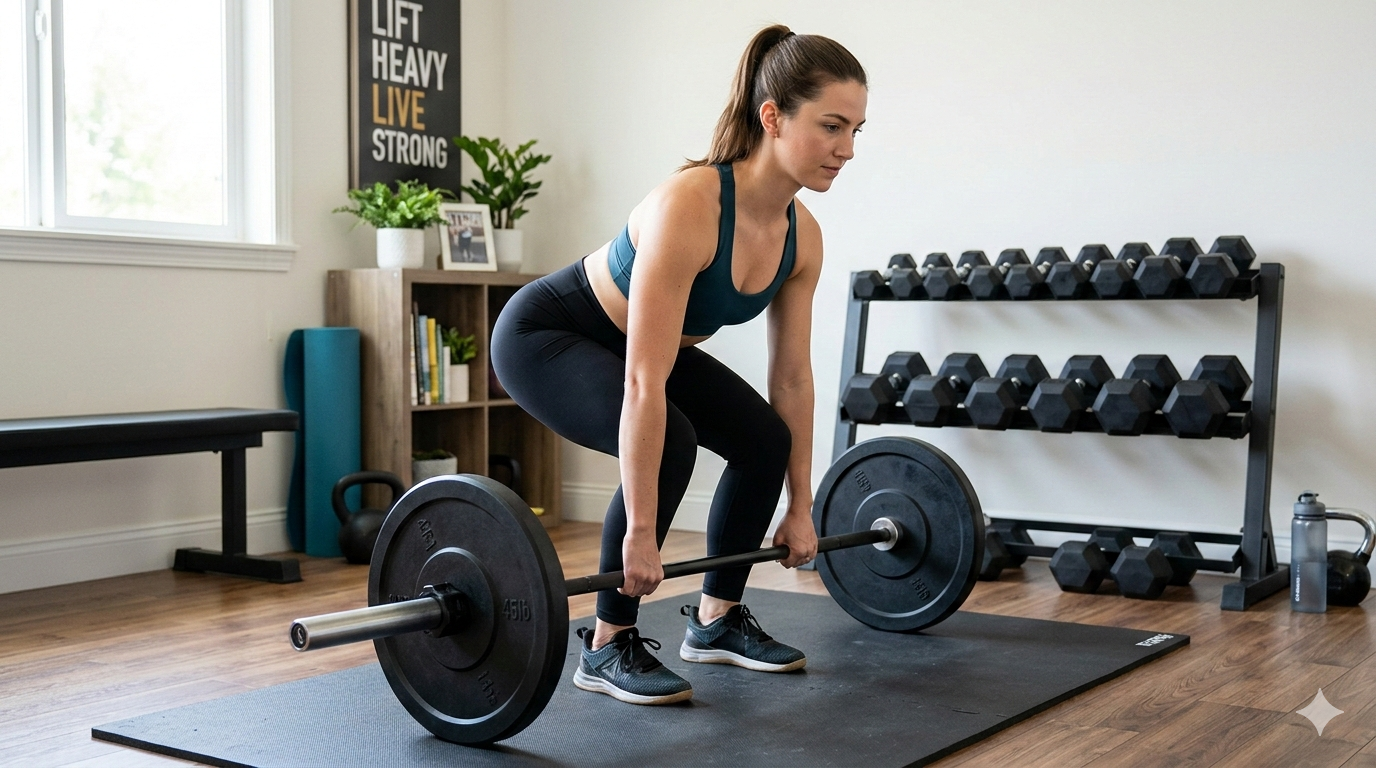
How to Do a Deadlift at Home: Step-by-Step Form Guide
We’ll use the conventional deadlift as our base — it’s the most common variation and the foundation for all others. Once you’ve mastered this, variations become much easier to learn.
Step 1: Set Up Your Starting Position
- Stand with your feet hip-width apart, toes pointing slightly outward (about 10–15 degrees).
- Place the weight (barbell, dumbbells, or band) in front of your feet, or for dumbbells, just outside your legs.
- If using a barbell, the bar should be over mid-foot — about 1 inch from your shins.
- Take a big breath in and brace your core — think about creating a 360-degree tightness around your midsection.
Step 2: Hinge and Grip
- Push your hips back (not down) to hinge at the hip. This is the key distinction between a deadlift and a squat — you hinge, not squat.
- Bend your knees only until your hands reach the bar or dumbbells. Your shins should be roughly vertical.
- Grip the weight just outside your legs. Use a double overhand grip to start.
- Pull your shoulder blades back and down — “pack” your lats. Imagine bending the bar around your legs.
Step 3: Create Full Body Tension
- Before you pull, get tight. Squeeze your glutes, brace your abs like you’re about to take a punch, and take a deep breath into your belly (not your chest).
- Keep your chest up. Look forward or slightly down — not straight up, not at the floor.
- Your spine should be neutral — not rounded, not excessively arched. A natural flat-back position is the goal.
Step 4: The Pull
- Push the floor away from you (think “leg press the floor”) rather than thinking about lifting the weight up.
- Keep the weight as close to your body as possible throughout the entire lift. Dragging the bar up your shins is normal with a barbell.
- As the weight passes your knees, drive your hips forward to lockout. At the top, stand tall with hips fully extended, glutes squeezed, and shoulders pulled back.
- Do not hyperextend your lower back at the top. Stand straight and controlled.
Step 5: The Lowering Phase (Eccentric)
- To lower the weight, reverse the movement: push hips back first, then bend the knees as the weight passes them.
- Keep the weight close to your body on the way down just as you did on the way up.
- Reset your brace and position before the next rep. Don’t rush between reps — especially when learning.
| ⚠️ Important: Never round your lower back under load. If you feel your lower back rounding, reduce the weight immediately. A neutral spine is non-negotiable for safe deadlifting — especially when training at home without a spotter. |
7 Common Deadlift Mistakes to Avoid at Home
These are the most frequent errors people make — and fixing them will immediately improve both your safety and your results.
- Mistake #1: Squatting the deadlift.
Dropping your hips too low turns a deadlift into a squat. Keep the hip hinge as your primary movement pattern. Your hips should be higher than your knees but lower than your shoulders at the start.
- Mistake #2: Rounding the lower back.
A rounded lower back (lumbar flexion) under load is the fastest way to injure yourself. Always maintain a neutral spine. If your lower back rounds, lighten the load.
- Mistake #3: Letting the weight drift forward.
The further the weight moves away from your body, the more stress it puts on your spine. Keep it close — almost dragging it up your legs.
- Mistake #4: Jerking the weight off the floor.
A deadlift should begin with a controlled, steady pull — not a jerk. Engage everything before you start the pull. Think of taking the slack out of the bar before the actual lift begins.
- Mistake #5: Looking up excessively.
Craning your neck upward to look in the mirror strains your cervical spine. Keep your gaze neutral — about 10 feet in front of you on the floor.
- Mistake #6: Overextending at lockout.
At the top of the lift, stand straight — don’t lean back. Hyperextending your lower back at lockout is both unnecessary and potentially harmful.
- Mistake #7: Using too much weight too soon.
Ego lifting is the enemy of progress. Start lighter than you think you need to, nail the technique first, then progressively add weight. This is especially important when you’re training at home without a coach watching your form.
Best Deadlift Variations for Home Workouts
Once you’ve got the conventional deadlift down, these variations will add variety and target your muscles slightly differently:
Romanian Deadlift (RDL)
The RDL is the best deadlift variation for building hamstring strength and flexibility. Unlike the conventional deadlift, you start from a standing position and hinge until you feel a deep stretch in your hamstrings, then drive back up. Keep a slight bend in the knees throughout. Perfect for dumbbells or resistance bands at home.
Sumo Deadlift
In the sumo deadlift, you take a wide stance with toes pointed outward and grip inside your legs. This variation places more emphasis on the inner thighs (adductors) and glutes, with slightly less lower back involvement. It’s great if you have limited hip mobility or are working with a kettlebell at home.
Single-Leg Deadlift
The single-leg (or single-leg Romanian) deadlift is fantastic for improving balance, coordination, and unilateral strength. Stand on one leg, hinge forward while extending the other leg behind you for counterbalance. Use a light dumbbell to start. This variation also highlights and corrects strength imbalances between your two sides.
Stiff-Leg Deadlift
Similar to the RDL but with straighter legs, the stiff-leg deadlift creates even greater hamstring stretch and engagement. Keep a tiny soft bend in the knees to protect the joint — never fully locked out. Best suited for intermediate lifters who already have decent hamstring flexibility.
Trap Bar Deadlift (Hex Bar)
If you own a trap bar, this is arguably the most beginner-friendly deadlift variation. The hex-shaped frame lets you stand inside the weight, reducing lower back strain and making it easier to maintain good form. If you’re building a home gym, a trap bar is a worthy investment.
Simple Home Deadlift Program for Beginners (4 Weeks)
Here’s a basic progression you can follow if you’re just starting out with deadlifts at home. Start with whatever equipment you have:
Week 1–2: Build the Pattern
- 3 sets × 8 reps of hip hinge drills (bodyweight or very light load)
- Focus 100% on form — not weight
- Rest 90 seconds between sets
Week 3–4: Add Load Progressively
- 3 sets × 6 reps with a weight that feels challenging but controlled
- Add 5–10% more weight each week if the previous session felt strong
- Include 1 set of Romanian deadlifts at the end of each session
| 📈 Progressive Overload: The key to getting stronger at home is progressive overload — gradually increasing the challenge over time. Add reps, add weight, slow down the eccentric, or reduce rest time between sets. Without progression, you plateau. |
Deadlift Safety Tips for Home Training
Training at home comes with extra responsibility since you don’t have a trainer watching your form or gym staff around. Keep these safety principles in mind:
- Always warm up before deadlifting. Do 5–10 minutes of light cardio followed by hip circles, leg swings, and bodyweight good mornings.
- Use a rubber mat or yoga mat under your weights to protect your floor and prevent slipping.
- Film yourself occasionally. Set up your phone on a side angle to check your form — it’s the best coaching tool available at home.
- Never train to failure on deadlifts, especially alone. Leave 1–2 reps in reserve every set.
- If you feel sharp pain (not muscle fatigue) in your lower back, stop immediately. Muscle soreness is normal; joint pain is not.
- Stay hydrated and don’t deadlift when significantly fatigued. Technique breaks down fast when you’re tired.
Frequently Asked Questions
Can I deadlift without a barbell at home?
Absolutely. Dumbbells, resistance bands, kettlebells, and even a heavy backpack are all effective substitutes for a barbell. The movement pattern is what matters most — not the specific equipment. Many people build impressive deadlift strength using only dumbbells at home.
How heavy should I deadlift as a beginner?
Start lighter than you think you need to. For most beginners, starting with 20–30% of your bodyweight and focusing on form for 2–3 weeks before adding load is a smart approach. Your technique should always be the priority, especially in the early stages.
How many times a week should I deadlift?
Beginners do well deadlifting 2 times per week with at least 48 hours of recovery between sessions. The deadlift is a demanding movement that takes a toll on your central nervous system and posterior chain — more isn’t always better, especially when starting out.
Will deadlifts hurt my back?
Done with proper form, deadlifts are one of the safest and most beneficial exercises for your back. Research actually shows that progressive deadlift training can reduce chronic lower back pain. The risk comes from poor technique — primarily rounding the lower back under heavy load. Focus on form first.
What muscles does a deadlift work?
The deadlift is a full-body compound movement. Primary muscles worked include the hamstrings, glutes, and lower back (erector spinae). Secondary muscles include the upper back (traps and lats), core, quads, forearms, and calves. It’s one of the most complete exercises you can do.
Related Exercises to Complement Your Home Deadlift Training
If you’re building a complete home workout routine, pair your deadlift training with these complementary exercises for a balanced strength program:
- Hip thrust — targets glutes directly and improves lockout strength
- Romanian deadlift — builds hamstring flexibility and eccentric control
- Glute bridge — beginner-friendly posterior chain activation
- Good mornings — strengthens the lower back and teaches the hip hinge with a barbell on your back
- Bent-over rows — builds upper back strength needed for a strong deadlift setup
- Planks and dead bugs — core stability work that directly transfers to safer deadlifting
- Goblet squat — improves hip mobility and quad strength for better deadlift positioning
Final Thoughts: Start Deadlifting at Home Today
The deadlift is genuinely one of the best strength exercises you can do — and the fact that you can do it at home with minimal equipment makes it even more accessible than most people realize. You don’t need a gym, a spotter, or an Olympic barbell to get started.
What you do need is patience with your technique, a commitment to progressive overload, and the discipline to keep your ego in check when the weight feels light. Start with proper form, build a strong foundation, and the strength gains will follow.
Whether you’re working with dumbbells, a resistance band, or a full barbell setup, the principles in this guide apply universally. Hip hinge. Neutral spine. Keep the weight close. Drive through the floor. These four cues alone will take you further than any complex program.
Now get to work. Your posterior chain — and your lower back — will thank you.