There is something almost magical about baking sourdough bread. Unlike commercial yeast breads that rely on a packet from the grocery store, sourdough is powered by a living culture you create yourself — wild yeast and beneficial bacteria working together right on your kitchen counter. If you have ever wondered how to make a sourdough starter from scratch, the good news is that you only need two ingredients: flour and water.
This sourdough starter guide walks you through everything from day one to your first successful float test. Whether you are a total beginner or someone who tried before and ended up with a smelly jar of disappointment, this tutorial covers every step in plain language — no baking degree required.
By the end, you will have an active, bubbly starter ready to use in your first homemade sourdough loaf.
What Is a Sourdough Starter?
A sourdough starter — sometimes called a levain, wild yeast starter, or natural ferment — is a fermented mixture of flour and water that captures wild yeast and lactic acid bacteria from your environment. These microorganisms consume the natural sugars in flour and produce carbon dioxide (which makes your bread rise) and lactic acid (which gives sourdough its distinctive tangy flavor).
Unlike instant yeast, a sourdough starter is alive. You feed it regularly, and it rewards you with naturally leavened bread that is easier to digest, has a longer shelf life, and contains more complex flavor than anything you can buy at a store.
Related keywords naturally covered: wild yeast starter, natural sourdough culture, levain bread starter, fermented flour and water, lactic acid bacteria bread, naturally leavened bread.
What You Need to Make a Sourdough Starter
The sourdough starter ingredient list is refreshingly short. Here is everything you need before you begin:
| Item | Best Choice | Why It Matters |
| Flour | Unbleached whole wheat or all-purpose | Bleached flour kills wild yeast |
| Water | Filtered or left-out tap water (room temp) | Chlorine slows fermentation |
| Glass Jar | Wide-mouth 500ml+ jar | See bubbles and rise clearly |
| Kitchen Scale | Any digital scale (grams) | Consistent ratios = reliable results |
| Rubber Band | For marking rise level | Track activity and peak timing |
Sourdough Starter from Scratch: Day-by-Day Instructions
Most sourdough starters take 5 to 7 days to become active enough for baking. Some take up to 10 days, especially in cooler kitchens. Consistency matters more than speed — trust the process.
Day 1: Starting Your Wild Yeast Culture
In a clean glass jar, combine:
- 50g unbleached whole wheat or all-purpose flour
- 50g lukewarm filtered water (around 75 degrees F / 24 degrees C)
Stir vigorously for 30 seconds to incorporate oxygen. Cover loosely with a cloth or plastic wrap with a small hole (not sealed airtight). Leave at room temperature (70-75 degrees F / 21-24 degrees C). Do not feed it again today.
Tip: Whole wheat flour jump-starts fermentation because it contains more wild yeast and nutrients than white flour.
Day 2: The Waiting Game (No Feeding Today)
You might not see much action yet. A small bubble or two — or nothing at all. That is completely normal. The bacteria are establishing themselves. Resist the urge to add more flour. Leave the starter alone at room temperature.
Day 3: First Feeding and Signs of Life
By now you should see some bubbles forming. The mixture may smell sour or yeasty — both are good signs. Time for your first feeding:
- Discard about half of your starter (roughly 50g) — save it for sourdough discard recipes
- Add 50g fresh unbleached flour
- Add 50g filtered room-temperature water
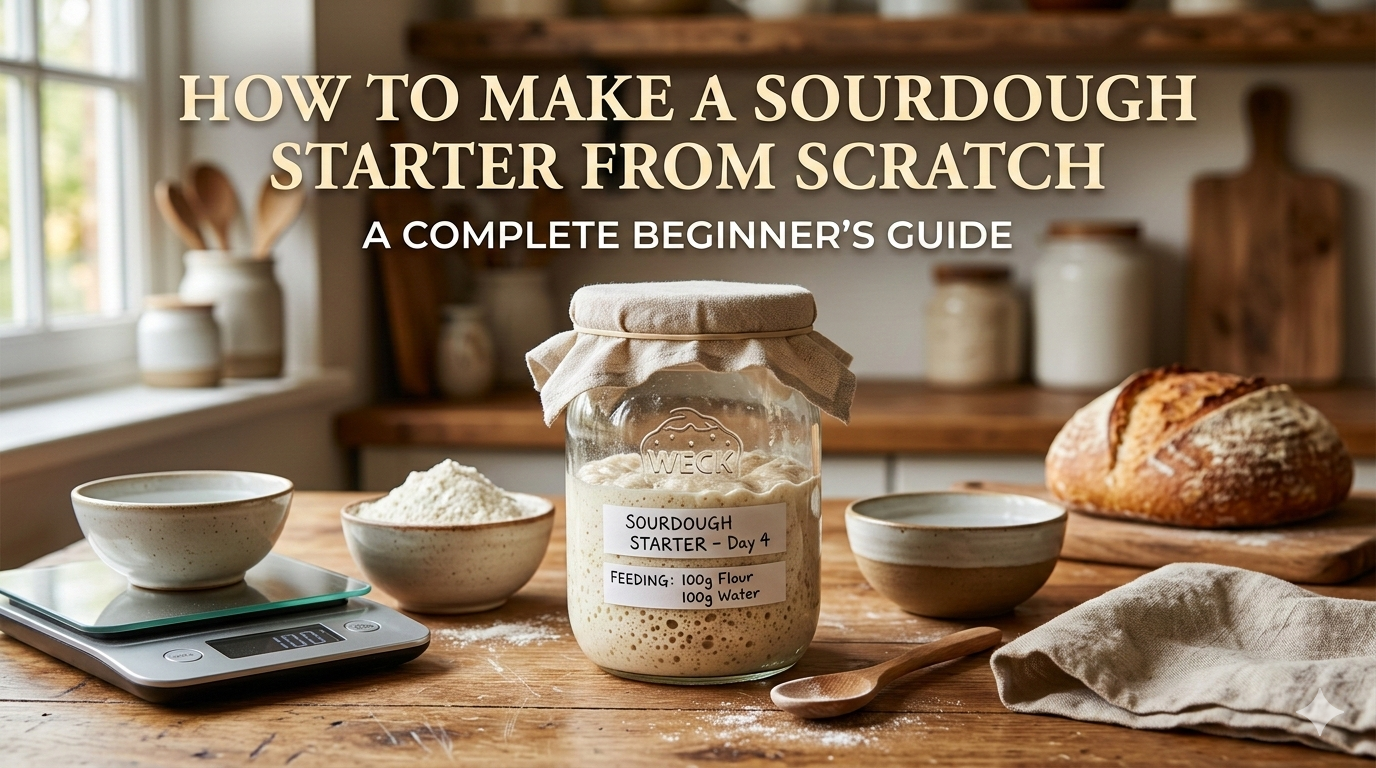
- Stir well, mark the jar level with a rubber band, cover loosely
Note: The sourdough discard step is not waste. Discarding prevents excess acid buildup and keeps your starter from becoming too large. Sourdough discard works beautifully in pancakes, crackers, waffles, and flatbreads.
Days 4 to 5: Regular Feeding Schedule Begins
From Day 4 onward, feed your starter once or twice a day using the 1:1:1 ratio — equal parts starter, flour, and water by weight. Each time you feed, watch for the starter to rise above your rubber band marker. A healthy starter typically peaks 4 to 8 hours after feeding at room temperature.
Your starter is developing its unique microbiome. The smell will shift from unpleasant (sharp, cheesy, or alcoholic) to pleasantly tangy and yeasty. This signals that beneficial lactic acid bacteria are becoming dominant.
Days 6 to 7: The Float Test and Knowing When Your Starter Is Ready
A ready starter will double in size within 4 to 8 hours of feeding, have a domed top (not flat or sunken), be full of bubbles throughout, and smell pleasantly sour and yeasty.
The Sourdough Float Test:
- Drop a small spoonful of starter into a glass of cold water
- If it floats — your starter is active and ready to bake with!
- If it sinks — continue daily feedings and test again in 1 to 2 days
Sourdough Starter Feeding Schedule at a Glance
Once established, here is how to maintain your starter long-term:
| Situation | Feed Frequency | Storage | Ratio |
| Baking every day | Once or twice daily | Counter (room temp) | 1:1:1 |
| Baking weekly | Once a week | Refrigerator | 1:5:5 |
| Long-term storage | Every 2 to 4 weeks | Refrigerator | 1:10:10 |
| First week (active) | Every 12 hours | Counter | 1:1:1 |
Sourdough Starter Troubleshooting: Common Problems and Fixes
Even experienced bakers run into issues. Here are the most common sourdough starter problems and exactly how to fix them:
Problem: Starter is not rising or bubbling
Cause: Kitchen too cold, bleached flour, or chlorinated water.
Fix: Move to a warmer spot, switch to unbleached flour, use filtered water.
Problem: Hooch (gray liquid on top)
Cause: Starter is hungry — it has consumed all available food.
Fix: Stir or pour off the liquid, then feed immediately. This is not mold.
Problem: Pink, orange, or fuzzy mold
Cause: Contamination from airborne bacteria.
Fix: Discard this starter entirely, scrub the jar, and start fresh. Rare, but it does happen.
Problem: Smells like nail polish remover
Cause: Too acidic — ethyl acetate buildup from over-fermentation.
Fix: Try a 1:5:5 feeding to dilute acidity and feed more frequently.
Problem: Rises then collapses very quickly
Cause: Peaking too fast — temperature is too warm.
Fix: Use slightly cooler water or feed less frequently.
Best Flour for Sourdough Starter: Does It Really Matter?
Yes, flour type matters — especially when you are building a new starter. Here is a breakdown of the best flour options:
Whole Wheat Flour — Best for Day 1
High in wild yeast and nutrients, kick-starts fermentation quickly.
Bread Flour — Best for maintaining an active starter
High protein helps build a strong, airy starter.
All-Purpose Flour (Unbleached) — Great all-rounder
Easy to find, produces a mild-flavored starter.
Rye Flour — Excellent for struggling starters
Enzyme-rich — great for reviving a sluggish or slow starter.
Bleached All-Purpose Flour — Avoid
Chemical treatment kills wild yeast — not suitable for starters.
Pro Tips for a Stronger, More Active Starter
- Temperature is everything: Wild yeast thrives between 70 to 80 degrees F (21 to 27 degrees C). In winter, try placing your starter near a warm appliance, or in the oven with just the light on.
- Use weight, not volume: Grams are far more accurate than cups when working with flour and water. A digital kitchen scale is the single best investment for sourdough baking.
- Stick to a routine: Feed at the same time every day. Consistency accelerates the development of a stable, predictable microbial culture.
- Keep a dehydrated backup: Once your starter is active, spread some thinly on parchment paper and let it dry completely. Crush and store in an airtight jar — it lasts for years.
- Try different hydration levels: The standard 100% hydration starter (equal flour and water by weight) is great for beginners. A stiffer starter ferments more slowly and produces a milder flavor — worth experimenting once established.
- Switch to bread flour after Day 7: Once your starter is active, bread flour’s higher protein content helps maintain a more vigorous, reliable rise.
What to Do with Sourdough Discard
Every feeding produces discard. Before your starter is active enough to leaven bread, this discard will not create a proper rise — but it is perfect for a range of baked goods. Store it in a sealed jar in the fridge for up to two weeks.
Great sourdough discard recipes include:
- Sourdough discard pancakes (fluffy and tangy)
- Sourdough flatbread or tortillas
- Sourdough discard crackers
- Sourdough banana bread
- Sourdough discard waffles
- Sourdough pizza dough
- Sourdough discard muffins
Frequently Asked Questions
How long does it take to make a sourdough starter from scratch?
Most starters become active within 5 to 7 days at room temperature. In a cool kitchen (below 65 degrees F), it can take up to 10 to 14 days. Patient, consistent feeding is the key.
Can I use tap water for my sourdough starter?
You can, but chlorine in tap water can slow fermentation. Use filtered water, or fill a glass with tap water the night before and let it sit out — chlorine will off-gas by morning.
Why does my sourdough starter smell bad?
Early starters often smell cheesy, vomit-like, or alcohol-like. These are all normal stages of fermentation. By Day 5 to 7, the smell should become pleasantly tangy and yeasty. Pink discoloration or visible mold means starting over.
Do I have to discard when feeding sourdough starter?
Technically no, but you should. Without discarding, the starter grows very large quickly and becomes too acidic, which weakens the wild yeast. Discarding keeps the culture balanced.
Can I refrigerate my starter right away?
No — refrigerate only after your starter is consistently active and passes the float test. A starter in the fridge goes dormant and needs only weekly feedings, but an immature starter placed in the fridge will likely stall completely.
What is the right sourdough starter hydration?
A 100% hydration starter (equal weights of flour and water) is the standard starting point for beginners. Once comfortable, experiment with stiffer or more liquid starters to change flavor and fermentation timing.
Ready to Bake? Your Starter Is Just the Beginning
Making a sourdough starter from scratch is one of the most rewarding things you can do in the kitchen. Yes, it takes a week. Yes, you might have a false start or two. But when that jar finally bubbles up, doubles in size, and floats — you will feel like you have created something genuinely alive.
From here, the sourdough journey opens up completely: your first rustic loaf, sourdough sandwich bread, whole wheat sourdough, even sourdough pizza dough. All of it starts with this one simple jar of flour and water.
Keep feeding it, keep baking, and enjoy every tangy, chewy slice.